Non-contact Forces Unit – Grade 3

Nov 10, 2023

Students investigate a phenomenon of how the magnets on a magnetic ring toy appear to levitate and how, after compressing and releasing them, the magnets spring up into the air. Over the unit, students learn about balanced and unbalanced forces to work towards explaining how and why the gaps between magnets are different sizes and how the magnets move or ‘float’ in particular ways.

This unit is structured into two sets of lessons. First, students learn about pushes and pulls, material properties, magnetic fields, and how multiple forces can act on one object to explain how the magnetic ring toy works. Then, students ask questions, design and conduct their own investigations, and write an informational text to answer their testable questions about magnets and magnetism. Ultimately, students develop and revise evidence-based models to explain how the magnetic ring toy works and then apply these ideas to explain their investigation data and other magnetic force-related phenomena that we use in everyday life.

Storyline

This curriculum guide provides an outline of a unit about magnetic and gravitational forces for grade 3. During the initial elicitation of students’ ideas about a magnetic ring toy phenomenon, many ideas, topics, and connections may be brought up by students. Use these examples as avenues for investigations and developing understanding. Modifications are essential to being responsive to your students’ learning.

Central to this unit are the ideas that students offer in their attempts to explain the anchoring phenomenon. By honoring multiple types of talk and eliciting student ideas, the teacher can identify touchpoints of students’ ideas and examples that become the focus for later investigations and activities. The explanation of the anchoring event can also be turned toward identifying testable and researchable questions students have and can then pursue in pairs or teams to answer together.

To launch this unit, 3rd-grade students explore a phenomenon of how the magnets on a magnetic ring toy appear to levitate and how, after compressing and releasing them, the magnets spring up into the air. Over the unit, students learn about balanced and unbalanced forces to work towards explaining how and why the gaps between magnets are different sizes and how the magnets move or ‘float’ in particular ways.  Why are there sometimes spaces between the donut-shaped magnets? Do the gaps change size when adding/removing magnets? Why do you think this happens? Push the magnets down and then let go. What happens? Why do the magnets separated by gaps seem “bouncy”?

This unit is structured into two sets of lessons with a culminating engineering design task:

  • First, students learn about pushes and pulls, material properties, magnetic fields, and how multiple forces can act on one object to explain how the magnetic ring toy works. 
  • Then, students ask questions, design and conduct their own investigations, and write an informational text to answer their testable questions about magnets and magnetism. 
  • Ultimately, students develop and revise evidence-based models to explain how the magnetic ring toy works and use these ideas to solve a problem in their classroom, school, or home using magnets.

Equity

What the curriculum does well…

  • Supporting Student Sensemaking. Opportunities for surfacing and supporting students’ sensemaking over time through discussions and modeling-to-explain about their own personal experiences with noise and sound and their shared experiences (investigations, readings, videos, discussions) as a classroom learning community. Look for these icons in the curriculum: 
    • Model to explain
    • Public charts 
    • Share and discuss 
    • Partner talk
  • Broadening language of communication. Encourages materials to be accessible/available for students, especially when partner reading. Students use magnets to act out claims in the text (and sometimes uncover conditions under which these claims hold true or not). This allows partners to demonstrate their comprehension of the text to each other by showing it instead of only relying on gestures, speaking, and listening. 
Left: Partners read, highlight, and discuss the text on when and why magnets push and pull. They act it out using magnets. Right: Students processed new learning by creating a notebook entry using sketches, models, and text. Again, magnets are available for students to double-check and test their claims.

Left: Partners read, highlight, and discuss the text on when and why magnets push and pull. They act it out using magnets. Right: Students processed new learning by creating a notebook entry using sketches, models, and text. Again, magnets are available for students to double-check and test their claims.


What needs to be done to be justice-focused…

  • Exploring Issues of Technological Decision Making & Power. The content does not incorporate a justice focus. In related curriculum, students are asked to consider ideas like maglev trains’ social and environmental impacts and stakeholders important to constructing such transit systems. Teachers ask: “Who and what should be considered when developing mass transit systems?” With this focus, the political, economic, and human impacts are woven into conversations about science. Students confront issues of power- and not just magnetic power- and can understand how power is used alongside science. If interested, use these resources as starting places.

These critiques are starting places. Adapt tools and resources within this unit and add or change activities based on ideas your students bring up in class, and critique our critiques!

Stories

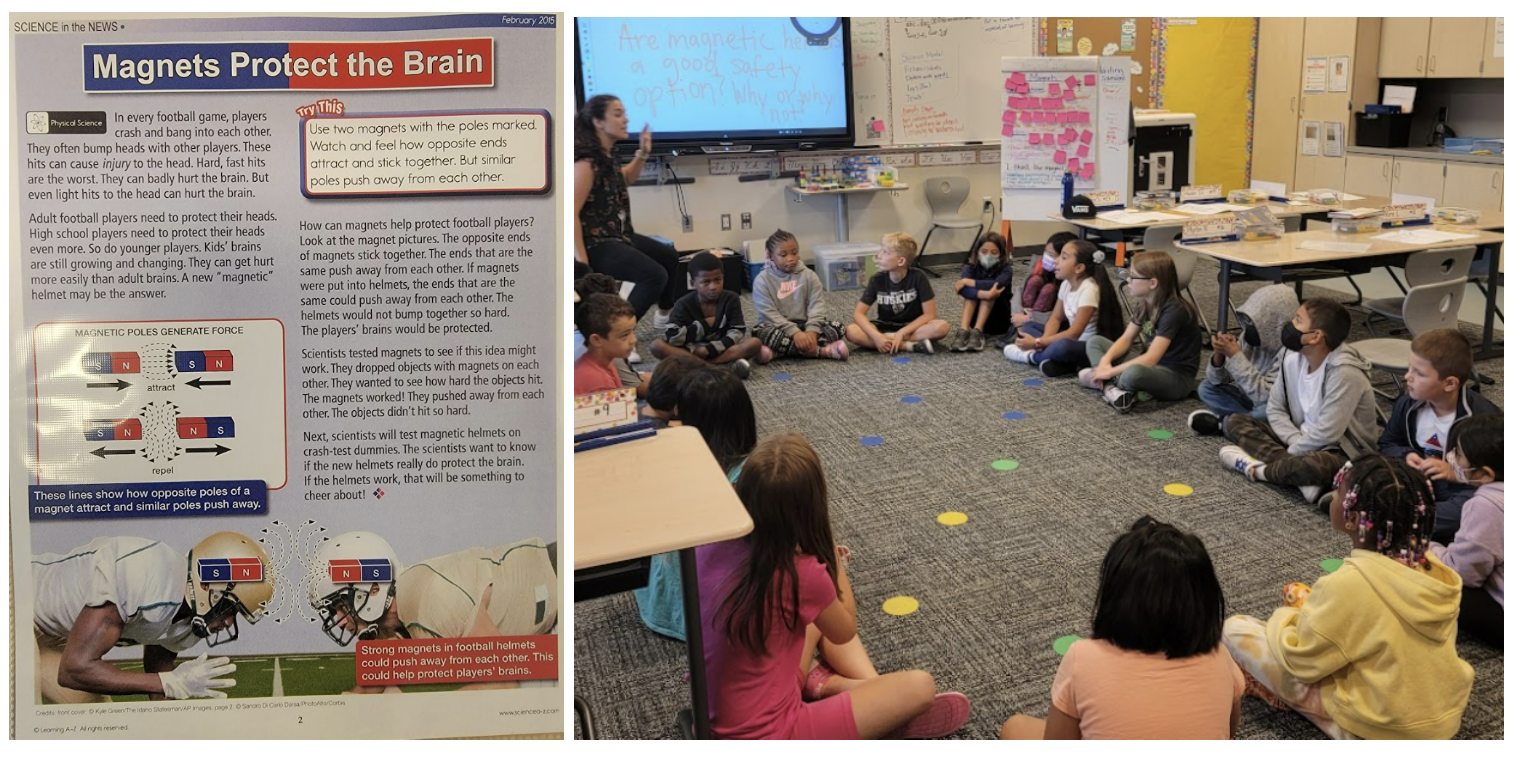
Modification based on student experiences: Ms. Johnson, a 3rd-grade teacher, added a one-page article mid-unit titled, ‘Science in the News: Magnets Protect the Brain” available from Learning A-Z (subscription). It described a possible solution to concussions for football players if magnets were put into helmets. She knew many of her students played football and discussed their injuries and hard hits during morning check-ins. Students read the one-page news article and then critiqued and debated magnets as a safety solution. The connection to football sparked passionate engagement from football-playing students who used this as an opportunity to share their knowledge of safety gear, helmet features, formations, plays, and drills. Other students took up details from their peers’ descriptions to interrogate whether magnets in helmets would be a useful and realistic safety feature (or not).

On the left a poster describes how magnets protect the brain. It shows how magnets can attract and repel each other, and generate force through magnetic poles, as well as shows two football players with a caption reading: Strong magnets in football helmets could push away from each other. This could help protect football players' brains. On the right, a teacher asks the students in the class if magnets are a good safety option why or why not.

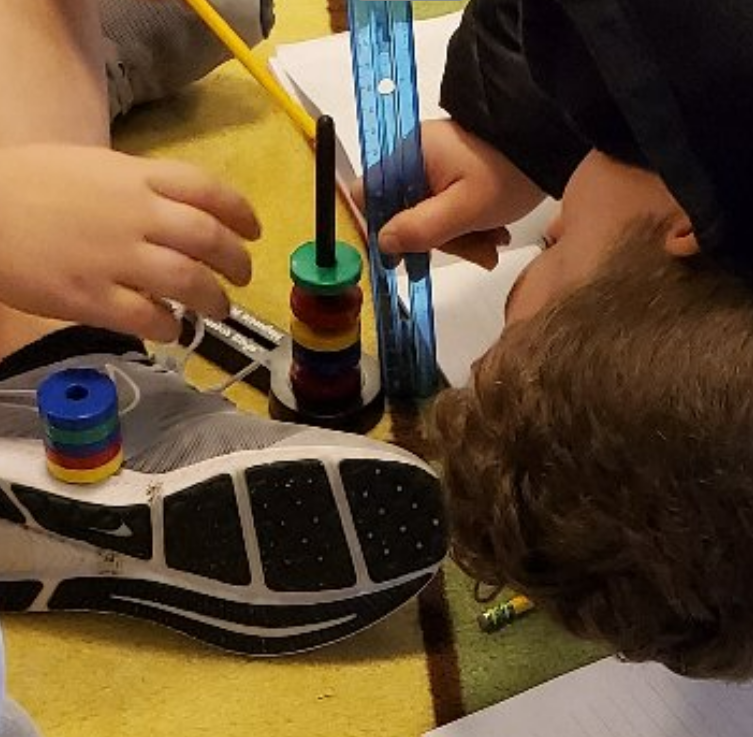
Debating data-collection techniques: 3rd graders were engaged in a challenge of how high the top magnet can go up (“fly”) when the stack is compressed and released (Lesson 4, Part 3) and had agreed they needed to use a ruler to measure how high the magnet went. Groups tested various configurations and numbers of magnets and took measurements. As the teacher led the class in a gallery walk, group by group, for the final testing and measuring, students exclaimed, “Not fair!” as they noticed some groups claiming higher launches and noticing they measured from different places.  Some groups measured from the top of the magnet stack when compressed, some measured from the top before compressing, some measured from the floor, and others from the top of the base of the toy. When groups compared data to see which configuration of magnets ‘won’ the contest by going up the highest, they realized they were using the ruler in different ways which gave numbers that could not be compared in fair ways. This precipitated a brief decision to come to a class consensus on how specifically to measure the height of a magnet so the data would be fair to compare. The gallery walk of final tests was paused to have groups return to their spots and re-test and re-measure using the established technique. This opportunity could have been missed or over-scaffolded by front-loading by the teacher at the beginning. Allowing students to encounter this issue made the conversation meaningful to students.

Photos showing students measuring the height the top magnet(s) went after releasing the compressed stack with a ruler.

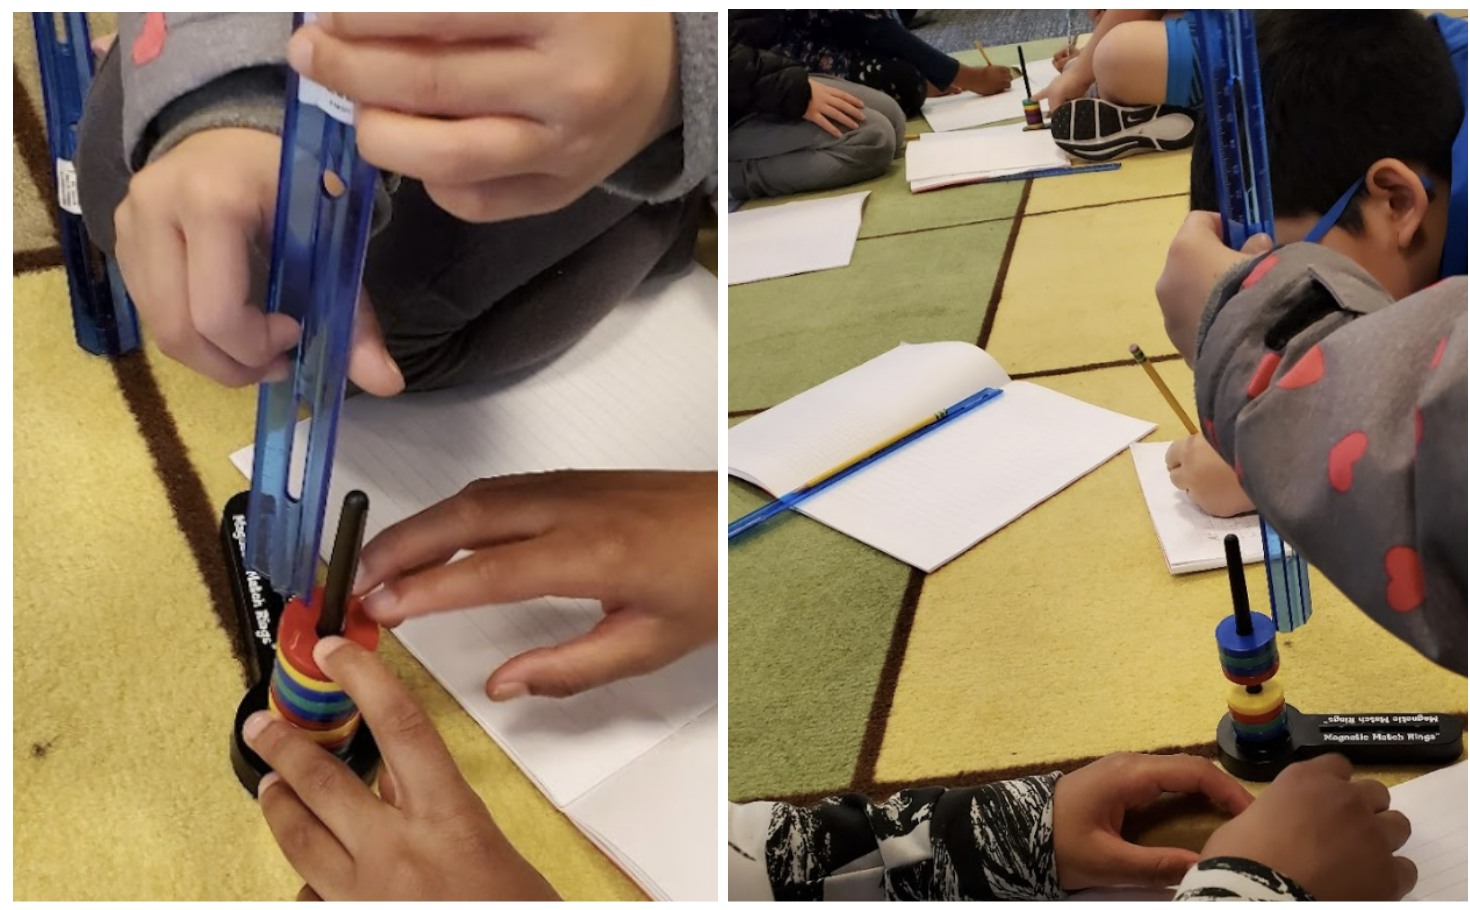
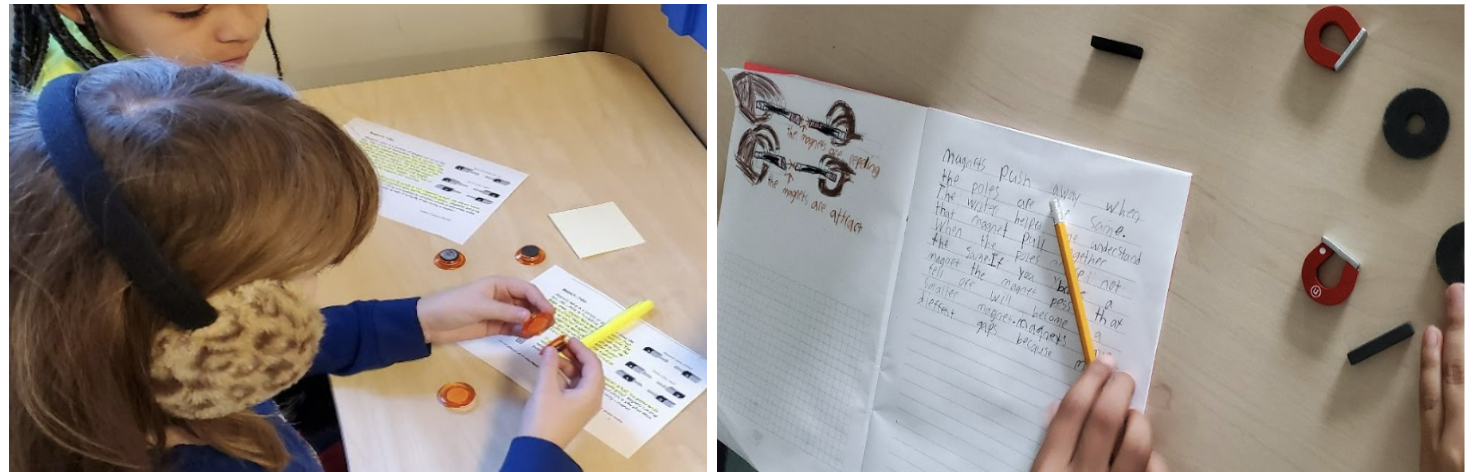
Photos show students measuring the height the top magnet(s) went after releasing the compressed stack with a ruler.

Modeling feedback task: Jamboard model critique (link to view only file) – The teacher used this model analysis task with students after launching the unit to provide feedback on modeling to help students deepen their models to show ‘how/why’ thinking, not just ‘what’ they observed. Students were learning remotely at the time so the teacher used jamboards in breakout rooms to notice and label what parts of the models they thought were useful in communicating “how/why” ideas not just “what”-level ideas. (This task can be done paper/pencil providing each group with a pair of models and sticky notes). After discussing their reactions to these models and what features helped the author convey thinking, students then went back to their models and added features to help convey more “how” or “why”-level thinking about how the magnetic ring toy works.

Teacher Educators & Professional Learning

Design Considerations


If you are using this curriculum as a part of professional learning or teacher education, here are a few considerations:

  • The downloadable documents are extensive and can overwhelm even experienced teachers. Consider breaking down the document and sequencing it so teachers can see how the unit unfolds over many periods. During an exploration of the curriculum, provide plenty of opportunities for teachers to think of alternative activities and ways they might improvise to accommodate novel student ideas. 
  • Over the course of a unit, many ideas and aspects of sound and energy will be explored. How might teachers support students in tracking, organizing, sharing, and co-authoring their understanding of the concepts? Consider using the RSST tool to track student ideas. 

Equity Questions for Teacher Reflection


  • If students are unable to draw out their ideas about non-contact forces, how might you support them in explaining in words what they think is happening?
  • Are there any local or more relevant examples of magnetic forces to use with students?
  • During this unit, how will you develop a class culture that encourages students to offer their own ideas, examples, and explanations related to the unit?

Stories


As a professional development facilitator in Knoxville, Tennessee, I use this unit to deepen teacher understanding of high-leverage instructional practices such as student discourse, teacher questioning, and scientific modeling. One way I structure this professional development is to first have teachers experience the magnets unit as a learner. Teachers then teach the unit in their classroom and reflect on their experience. (Rachel Cox, Science Facilitator for Knox County Schools)

Left image: Experience lesson 3 Cohort Goal: -Deepen teacher content knowledge -Use models to support student sense making Activity Goal: -Experience having your thinking questioned and use models to communicate your thinking Right image: A teacher explaining to another instructor about the magnets unit.

Below is a description of a learning task from a 2023 third-grade professional development using the magnets unit.

  • 30-45 minutes: Teachers create their own initial models and experience a portion of lesson 3 as a learner.
  • 10-minute reflection: Teachers respond to the reflection question and then share it with their table group. 

Meta Moment: Thinking about your thinking. What modeling strategies helped you communicate your thinking? How did modeling support your thinking? Knox country science. Search, solve, & succeed.

  • 10-minute silent read: Teachers read and annotate pages 125-129 of chapter 6: Making Thinking Visible Through Models from the Ambitious Science Teaching book. Having teachers experience what using a model did for their own thinking before reading this excerpt from the book makes this a powerful learning experience for teachers with actionable ways to get started in their own classrooms. 
  • 10-minute discussion: The facilitator asks the whole group, “What resonated with you from this reading?” This reading has given our third-grade teachers ideas about how to get started with modeling in their classrooms. Below are examples from two teachers who participated in the professional development and transferred their new learning to practice.

Sample word walls with the unit name, what an be used to show details in scientific diagrams such as arrows, color, and labels, and vocabulary such pull = attract, gravity, and magnetic force. The image on the right is of another word wall about magnets with criteria for models and a list of magnet vocab such as attract, repel, push, horizontal, balanced force, and energy (the two photos are courtesy of J. Jenkins Ball Camp Elementary and H. Grant Blue Grass Elementary).

Research and NGSS

NGSS

  • 3-PS2-1. Plan and conduct an investigation to provide evidence of the effects of balanced and unbalanced forces on the motion of an object.
  • 3-PS2-2. Make observations and/or measurements of an object’s motion to provide evidence that a pattern can be used to predict future motion.
  • 3-PS2-3. Ask questions to determine cause & effect relationships of electric or magnetic interactions bet. two objects not in contact with each other.
  • 3-PS2-4. Define a simple design problem that can be solved by applying scientific ideas about magnets.

Related Posts

This site is primarily funded by the National Science Foundation (NSF) through Award #1907471 and #1315995