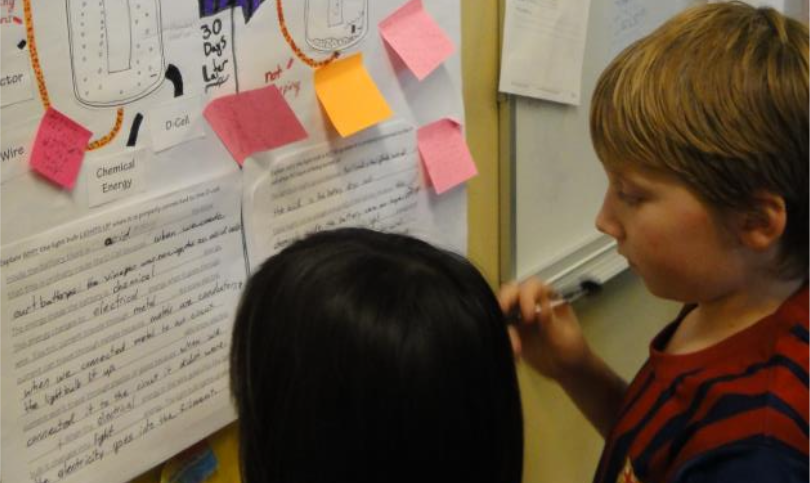
Here, we share a general flow and set of tips for implementing sticky note student feedback in the classroom. Of course, the first time you implement this process, it may look a bit different and take longer as students grapple with each other’s work and distinctions between helpful and not-so-helpful feedback for the first time
Tip 1: Planning: Decide when the class’s work is at a useful stage for feedback. This process is most productive when a set of student work is rich with multiple ideas and ways of thinking (not identical). Students should also be able to draw on prior activities and investigations as evidence when considering each other’s work. It can be productive to engage in feedback around models or explanations mid-way through a unit or near the end of a unit, since students will have multiple sources of evidence to draw on.
Tip 2: Have students post their work (~5 min). Work can be taped or pinned on walls or cabinets, or placed on otherwise clear desks.
Tip 3: Introduce the activity – discuss key feedback purposes, characteristics, and processes (~10-15 min).
- Take a few minutes to share and have students share why it is helpful to look at each other’s thinking and to give and receive feedback. Highlight this as a practice of science, where scientists peer-review each other’s findings.
- First time tip: You may want to record these ideas publicly for future reference.
- If you have a list of ideas from previous feedback sessions, consider revisiting these and inviting any additions or changes as students gain experience giving and receiving feedback.
- Review examples of helpful and not-so-helpful feedback together. Use the examples to have the class describe characteristics that make a piece of feedback helpful or not-so-helpful. Below is an example of “Helpful” and “Nice, but not helpful” feedback using content from a 4th-grade circuits unit, to see what this could look like. We suggest writing example feedback for specific units that showcase features you want students to consider. (For instance, helpful feedback is specific and actionable.)

-
- First time tip: To help draw students’ attention to key features, you may want to group the helpful and not so helpful examples yourself. Ask students to consider what they see in the examples, and what is similar and different between the groups.
- In later feedback sessions, students could group the examples and explain why they are helpful or not so helpful.
- Introduce or review feedback sentence stems and processes for sharing feedback via sticky notes. Sentence stems can help students identify particular parts of their peers’ work and ask questions or make suggestions.


- Different colored sticky notes could reflect different kinds of suggestions (like proposing a new idea, or asking a question). Ensure students have access to the characteristics of helpful feedback, sentence stems, and sticky notes before they begin.
- First time tip: Consider having students practice giving feedback with the stems on a sample piece of work and discuss how their feedback is helpful and could be more helpful. Or begin by having students place notes on their own work that reflect the kind of feedback they would like to receive.
Tip 4: Students circulate and give feedback (~15 min). Have students travel in pairs or groups and work together to examine 2 to 3 samples of their peers’ work, leaving at least 2 or 3 sticky notes with feedback at each piece of work. You could organize this in two ways:
- Timed feedback: If you would like a more orderly progression, you can give students 5 minutes at each work sample before calling time and having students move in one direction to the next piece of work. This helps to ensure all work gets at least 2 or 3 sticky notes with feedback. This approach may be helpful for the first few times engaging in the sticky note feedback process.
- Milling around: Students can move about as they are ready, but if a spot looks crowded they must find another spot. This releases responsibility to the students to manage their time and be mindful that all work gets feedback. This method usually results in more feedback for each piece of work since students work at their own pace.
Tip 5: Return and respond to feedback (~10 min). Students read and consider the feedback they received, deciding what to do in response. They may add or change something about their work, taking up the suggestions of their peers. However, they may also leave a sticky note to return to later (i.e., if it asks a question they are not sure of yet), or they may counter a suggestion if they disagree and clarify the point in their work.
Tip 6: Reflect on the feedback and process (~5 min). Did any group get any particularly helpful feedback? Provide some time to acknowledge this and point out what was helpful. In an example protocol below, high schoolers were invited to interact around the entire feedback process, including consideration of the quality of their feedback. On one sheet of paper, “reviewers” first provided feedback in the form of a question in the upper left. Original authors reviewed the feedback and responded on the right side, then reviewers considered authors’ responses to determine whether their feedback was effective.


 This site is primarily funded by the National Science Foundation (NSF) through Award #1907471 and #1315995