Modeling support: Scaffolding versus White Space
What’s a good problem to have? That your students know more than they can show! When engaged in Ambitious Science Teaching (AST) practices, students have a lot to tell. It often comes as a big surprise to teachers who are starting out with AST how eager their students are to share their ideas. So how can we support them to express what they think?
Scaffolding: We all know that scaffolding helps our students articulate their best thinking. Scaffolding can organize the space, and guide students to focus on important aspects when they create and revise explanatory models. Scaffolds for modeling may include before-during-after panels, the outlines of shapes (e.g., a body, a flask), or zoom-in bubbles that invite students to show what cannot be seen. Written explanations that accompany models can be scaffolded through what-, how-, and why-questions; sentence frames; or checklists*. Every scaffold should be designed very specifically for your students, your context, and the scientific ideas and practices that are important to explain your anchoring phenomenon.
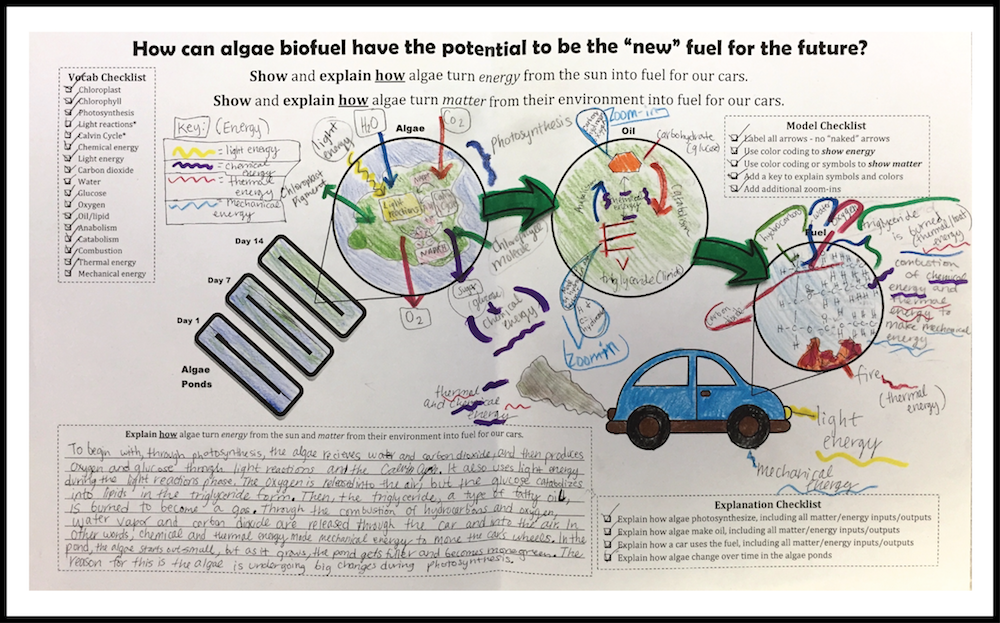
[About the image: At the end of a unit on the promise of biofuel, this high school student took advantage of the scaffolding to visually express her ideas. But the writing lanes (left lower side) were too few, so she used the white space to express more of her thinking. (Photo thanks to Corin Malone, Auburn SD). ]
White Space: However, we also know that students have minds of their own, and not all scaffolding works equally well for all of our students. In this way, scaffolding is sometimes a double-edged sword. It can help and hinder at the same time. To offset the restricting characteristics of scaffolds, think about providing your students with ample white space on any paper and pencil (or electronic) handouts. If you provide outlines and organizing shapes for students on a modeling scaffold, make sure there is also space for students to use creatively. If you give writing prompts, provide enough lines. This is probably the number one restriction we see on a regular basis: there is simply not enough space for students to express ideas in depth. Consequently, students either squeeze what they want to explain into every free space they can find (see photo), and/or they stop writing when they run out of lines.
Getting creative with and on white space: If you are limited in the number of copies you are allowed to make at your school, have students use the backside of your handout as a place to share additional ideas and knowledge through drawing and writing. Or, if the information should stay connected to a graphic model, show your students how they can tape on paper or use sticky notes to add additional information. This can be on the outside of the original document, a flap on top of a text or graph, strings that attach additional material, etc., etc. You get the point.
If you allow for creativity, your students will use it. In the end, you too may be astonished at how much your students have to explain, how much they found out on their own over the course of a unit that is anchored by an interesting phenomenon, and how their knowledge exceeds the requirements of your curriculum in unexpected areas. And don’t forget– share your ideas and your students’ work with colleagues and the community!
Karin Lohwasser | University of Washington
* Hosun Kang at UCI and her colleagues have shown how scaffolding can deepen students’ explanations: Kang, H., Thompson, J., & Windschitl, M., 2014, Science Education, 98(4), 674-704.


 This site is primarily funded by the National Science Foundation (NSF) through Award #1907471 and #1315995